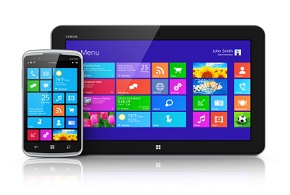
File Explorer is a generalized way of referring to an application that lets end users browse and edit directory structures. The best known File Explorer is Microsoft Windows Explorer.
The built-in File Explorer in Pocket PC 2002 is not very intuitive and does not offer a way to view the directory structure in a hierarchical fashion (see Figure 1). In this article, the second of a three-part series on the.NET Compact Framework), I’ll show you how to use the Compact Framework’s TreeView control to develop an enhanced File Explorer?one that works much more like the Windows Explorer on your desktop Windows OS.
![]() Figure 1. Nothing Fancy: The built-in File Explorer in Pocket PC 2002 leaves much to be desired. |
![]() Figure 2. Fresh Form: Populate your project’s Form1 with the various controls. |
To get started, launch Visual Studio .NET 2003 and create a new Smart Device Application project. Populate the default Form1 with the TreeView Control. Also add the ContextMenu and ImageList controls to your project (see Figure 2). The ContextMenu control allows you to display a context menu when you tap (and hold) the stylus on your Pocket PC. The ImageList control acts as a container for images. I will use the ImageList control to store the icons (for open and closed folders) used by the TreeView control.
You need to associate the ContextMenu control with the TreeView control by specifying ContextMenu1 in the ContextMenu property of the TreeView control. This causes the context menu to be displayed when the TreeView control is tapped (and held for a moment).
![]() |
|
Figure 3. Open and Shut: Adding images to the Images collection in the ImageList control. |
The ImageList control displays the folders using icons when the TreeView control is expanded. You need to associate the ImageList control with the TreeView control by specifying ImageList1 in the ImageList property of the TreeView control.
Add three icons to the Images collection in the ImageList control: open folder, closed folder, and ordinary file. You can see the three icons in Figure 3.
Now your form is done and you’re ready to add the code to make it all work.
Coding the Controls
First, import the System.IO namespace. This namespace is required for methods that I will use later to perform directory operations:
Imports System.IO
Next, define the three constants for referring to the three images in the ImageList control:
' Constants for the icon images Const icoOpen = 0 Const icoClose = 1 Const icoFile = 2
And the variables required:
Dim copy As Boolean = True ' whether it is a copy operation Dim fileName As String ' filename of file to be copied or cut Dim pathName As String ' full pathname of file to be copied or cut
When the form is loaded, display a node representing the root directory:
Private Sub Form1_Load(ByVal sender As Object, _ ByVal e As System.EventArgs) _ Handles MyBase.Load Dim node As New TreeNode Try ' ---create the root node--- node.ImageIndex = icoClose node.SelectedImageIndex = icoOpen node.Text = "" TreeView1.Nodes.Add(node) ' ---Add the dummy node--- node.Nodes.Add("") Catch err As Exception MsgBox(err.ToString) End Try End Sub
Note that I add a dummy node after each node is created. This is to ensure that the current node can be expanded to reveal subdirectories (even if there are none). This is shown in Figure 4.
![]() |
|
Figure 4. Dummy Node: Adding a dummy node to ensure that the directory can be expanded. |
When a node is expanded (by clicking on the “+” symbol), the TreeView1_BeforeExpand event is called. You have to write code that checks to see if the current node is a leaf node (meaning it is not a directory, but a file). If it is a leaf node, exit the method. Otherwise you need to display its sub-directories (if any).
You should also change the current node icon to “open” if the node is selected and “closed” if the node is not selected Here is the code for expanding folders and displaying the proper icon at each node:
Private Sub TreeView1_BeforeExpand _ (ByVal sender As Object, _ ByVal e As System.Windows.Forms.TreeViewCancelEventArgs) _ Handles TreeView1.BeforeExpand ' ---if leaf node then exit--- If e.Node.ImageIndex = icoFile Then Return ' ---remove the dummy node and display ' the subdirectories and files--- Try e.Node.Nodes.Clear() ' clears all the nodes and... displayChildNodes(e.Node) ' create the nodes again Catch err As Exception MsgBox(err.ToString) End Try ' ---change the icon for this node to open--- If e.Node.GetNodeCount(False) > 0 Then e.Node.ImageIndex = icoClose e.Node.SelectedImageIndex = icoOpen End If End Sub
The displayChildNodes() method displays all the files and subdirectories within the current directory in the TreeView control:
Private Sub displayChildNodes _ (ByVal parentNode As System.Windows.Forms.TreeNode) Dim FS As New DirectoryInfo(stripExtraSlash _ (parentNode.FullPath)) Dim dirInfo As DirectoryInfo Dim fileInfo As FileInfo Try ' ---displays all dirs--- For Each dirInfo In FS.GetDirectories() ' ---create a new node to be added--- Dim node As New TreeNode node.Text = dirInfo.Name ' name of file or dir node.ImageIndex = icoClose node.SelectedImageIndex = icoOpen parentNode.Nodes.Add(node) ' ---add the dummy node--- node.Nodes.Add("") Next Catch err As Exception MsgBox(err.ToString) End Try Try ' --display all files--- For Each fileInfo In FS.GetFiles() ' ---create a new node to be added--- Dim node As New TreeNode Node.Text = fileInfo.Name Node.ImageIndex = icoFile Node.SelectedImageIndex = icoFile parentNode.Nodes.Add(Node) Next Catch err As Exception MsgBox(err.ToString) End Try End Sub
Adding User Functions
The pathname used in Windows CE is not the same as that in Windows. In Windows CE, the root directory starts with a and subsequent subdirectories are separated by a . For example, Program Files indicates that the root contains a subdirectory named Program Files. The FullPath property of the Node object returns the full path name of a node, starting from the root node. The path is delimited by the character.
There is a minor problem you have compensate for. Because the root node is indicated by a , a typical path will contain an extra , for example \Program Files. Hence there is a need to remove the extra in the path name using the stripExtraSlash() method:
Public Function stripExtraSlash(ByVal str As String) As String ' ---strip away the extra "" for ' subdirectories. e.g. \My documents Dim path As String If str.Length > 1 And (Mid(str, 1, 1) = "") Then path = Mid(str, 2, str.Length - 1) Else path = str End If Return path End Function
When the user taps and holds an item with the stylus, which is equivalent to a right-click with a mouse, the context menu will be shown. You need to program a way for the File Explorer to handle common user functions such as Copy and Cut. If the user chooses Copy or Cut, the filename as well as the path of the item to be copied will be saved. When using cut, the selected node will also be removed:
Private Sub mnuCopy_Click(ByVal sender As System.Object, _ ByVal e As System.EventArgs) _ Handles mnuCopy.Click ' ---copy a file--- pathName = stripExtraSlash(TreeView1.SelectedNode.FullPath) fileName = TreeView1.SelectedNode.Text copy = True mnuPaste.Enabled = True End Sub Private Sub mnuCut_Click(ByVal sender As System.Object, _ ByVal e As System.EventArgs) _ Handles mnuCut.Click ' ---cut a file--- pathName = stripExtraSlash(TreeView1.SelectedNode.FullPath) fileName = TreeView1.SelectedNode.Text copy = False mnuPaste.Enabled = True ' ---remove the node--- TreeView1.SelectedNode.Remove() End Sub
To delete an item from the Pocket PC, use the File.Delete() method from the System.IO namespace. You must also remove the node representing the item to be deleted:
Private Sub mnuDelete_Click(ByVal sender As System.Object, _ ByVal e As System.EventArgs) _ Handles mnuDelete.Click ' ---delete a file--- File.Delete(stripExtraSlash(TreeView1.SelectedNode.FullPath)) TreeView1.SelectedNode.Remove() End Sub
To allow the user to paste an item that has just been copied or cut, use the File.Copy() method. You also need to add a new node to the TreeView control:
Private Sub mnuPaste_Click(ByVal sender As System.Object, _ ByVal e As System.EventArgs) _ Handles mnuPaste.Click ' ---paste a file--- File.Copy(pathName, stripExtraSlash _ (TreeView1.SelectedNode.FullPath) & _ "" & fileName, True) ' ---add the new node to the tree--- Dim node As New System.Windows.Forms.TreeNode node.Text = fileName node.ImageIndex = icoFile node.SelectedImageIndex = icoFile TreeView1.SelectedNode.Nodes.Add(node) ' ---if cut operation, then delete file--- If Not copy Then File.Delete(pathName) End If mnuPaste.Enabled = False End Sub
With that, you have a simply but fully functional mobile File Explorer that should look and feel like Windows Explorer on a desktop. You’ve created a TreeView control to allow the user to browse the file structure hierarchically, including the display of icons; you’ve allowed for expanding and collapsing directories; as well as supported copy, cut, and paste commands using methods from the System.IO namespace.
![]() |
|
Figure 5. Start Browsing: Be sure to test the completed enhanced File Explorer application. |
To debug the application, press F5. The completed application will look like Figure 5.
In the third and final article in this series, I’ll show you how to create controls during runtime. You will also learn how to develop .NET CF applications without using Visual Studio .NET.